Add Subtitles to Video with FFmpeg (3 Working Examples + Styling)
You need captions on your video. Maybe it's for accessibility, maybe TikTok and Instagram penalize uncaptioned content in their algorithms, or maybe you just want your audience to watch with the sound off. Whatever the reason, you're going to reach for FFmpeg.
And then you'll spend an hour fighting with filter syntax.
What Burned-In Subtitles Look Like
Before you write any code, it helps to see what you're building. These screenshots show the same video frame at three stages: no subtitles, default subtitles, and styled subtitles.
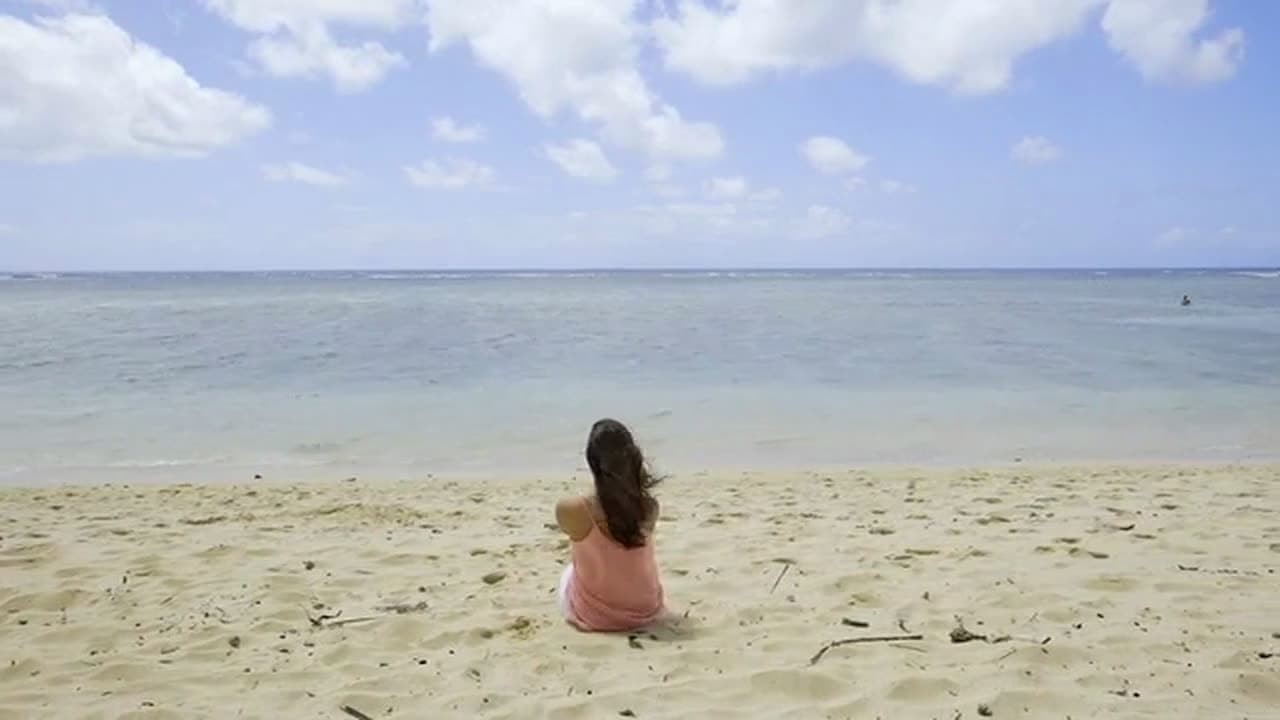
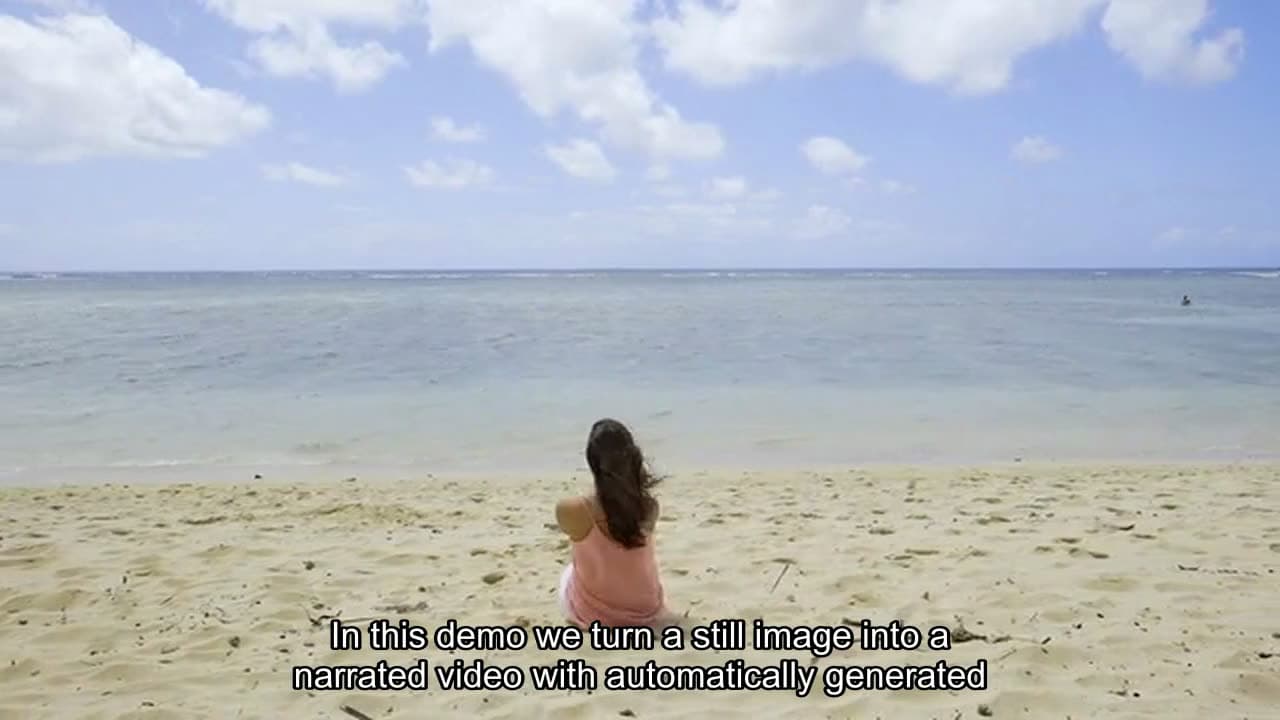
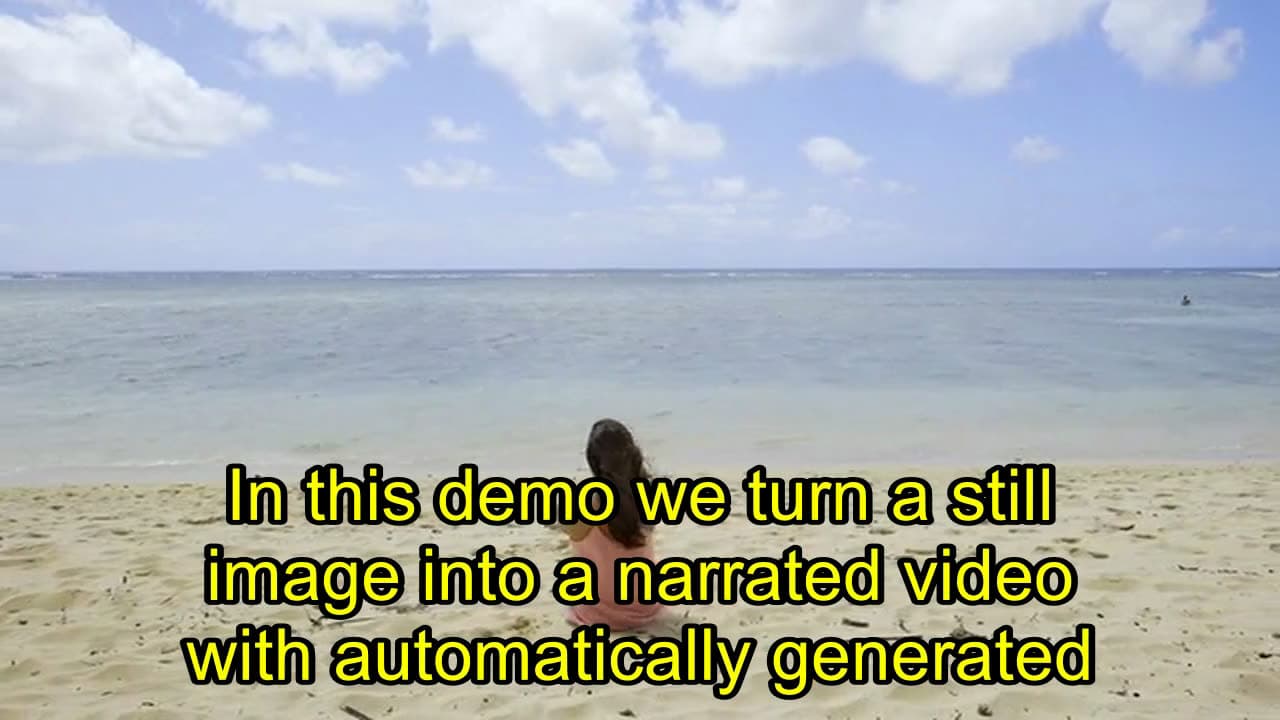
The default subtitles work, but they're small and hard to read on most screens. The styled version uses force_style to bump up the font size, change the color, and add an outline. We'll cover exactly how to do both below.
Adding Subtitles with FFmpeg CLI
FFmpeg supports two main approaches for burning subtitles into video: the subtitles filter (for SRT/ASS files) and the drawtext filter (for simple text overlays). The subtitles filter is what you want for actual captions.
Assuming you have an SRT file ready, the basic command looks like this:
ffmpeg -i input.mp4 -vf "subtitles=captions.srt" -c:v libx264 -crf 23 -c:a aac output.mp4
That works. But the moment you need to customize font size, color, or positioning, you're writing ASS override tags inside your SRT file or converting to ASS format entirely:
ffmpeg -i input.mp4 -vf "subtitles=captions.srt:force_style='FontSize=24,PrimaryColour=&H00FFFFFF,OutlineColour=&H00000000,Outline=2'" -c:v libx264 -crf 23 -c:a aac output.mp4
That single line is already hard to read. Add font paths (which differ between Linux, macOS, and Windows), character encoding issues, and the fact that FFmpeg silently fails on malformed SRT files, and you've got a debugging session ahead of you.
If you only need to process a handful of videos on your own machine, the CLI approach is fine. But if you're building a product that captions videos at scale, you don't want this running on your server.
force_style Parameter Reference
The force_style parameter controls how your subtitles look. You pass it as a comma-separated string of key=value pairs inside the subtitles filter. Every parameter is optional, and you can combine as many as you need.
| Parameter | What it does | Example value |
|---|---|---|
| FontName | Sets the font family | Arial |
| FontSize | Text size in pixels | 28 |
| PrimaryColour | Text fill color (BGR format) | &H0000FFFF (yellow) |
| SecondaryColour | Color used for karaoke effects | &H00FF0000 (blue) |
| OutlineColour | Border color around text | &H00000000 (black) |
| BackColour | Shadow/background color | &H80000000 (semi-transparent black) |
| Outline | Outline thickness in pixels | 2 |
| Shadow | Shadow distance in pixels | 1 |
| Alignment | Text position (numpad layout) | 2 (bottom-center), 8 (top-center), 5 (middle) |
| MarginV | Vertical margin from edge in pixels | 30 |
| Bold | Bold text (0 or 1) | 1 |
Color format
Colors use BGR (blue-green-red) format, not RGB. The format is &H00BBGGRR where each pair is a hex value from 00 to FF.
Common colors:
- White:
&H00FFFFFF - Black:
&H00000000 - Yellow:
&H0000FFFF - Red:
&H000000FF - Green:
&H0000FF00 - Blue:
&H00FF0000
If you have an RGB hex color like #FF5733, flip the pairs: 3357FF, then prefix with &H00 to get &H003357FF.
Ready-to-use examples
Large yellow text with black outline (great for short-form video):
ffmpeg -i input.mp4 -vf "subtitles=captions.srt:force_style='FontSize=32,PrimaryColour=&H0000FFFF,OutlineColour=&H00000000,Outline=2,Shadow=1'" -c:v libx264 -crf 23 -c:a aac output.mp4
Centered white text with semi-transparent background:
ffmpeg -i input.mp4 -vf "subtitles=captions.srt:force_style='FontSize=24,PrimaryColour=&H00FFFFFF,BackColour=&H80000000,Outline=0,Shadow=4,Alignment=2'" -c:v libx264 -crf 23 -c:a aac output.mp4
Red text at the top of the frame:
ffmpeg -i input.mp4 -vf "subtitles=captions.srt:force_style='FontSize=20,PrimaryColour=&H000000FF,Alignment=8,MarginV=20'" -c:v libx264 -crf 23 -c:a aac output.mp4
Burning Subtitles via the FFmpeg Micro API
FFmpeg Micro wraps FFmpeg's subtitle capabilities into a REST API. You send your video and subtitle file, specify the filter, and get back a captioned video. No server, no font path issues, no dependency management.
The approach uses the filters field on the /v1/transcodes endpoint. You provide your video and SRT file as inputs, then apply the subtitles filter:
curl -X POST https://api.ffmpeg-micro.com/v1/transcodes \
  -H "Authorization: Bearer YOUR_API_KEY" \
  -H "Content-Type: application/json" \
  -d '{
    "inputs": [
      {"url": "https://storage.example.com/video.mp4"},
      {"url": "https://storage.example.com/captions.srt"}
    ],
    "outputFormat": "mp4",
    "filters": [
      {"filter": "subtitles=captions.srt"}
    ]
  }'
Both files get downloaded and processed together. The subtitles filter references the SRT file by name, and FFmpeg burns the captions directly into the video frames.
You can style the subtitles the same way you would with CLI, using the force_style parameter:
curl -X POST https://api.ffmpeg-micro.com/v1/transcodes \
  -H "Authorization: Bearer YOUR_API_KEY" \
  -H "Content-Type: application/json" \
  -d '{
    "inputs": [
      {"url": "https://storage.example.com/video.mp4"},
      {"url": "https://storage.example.com/captions.srt"}
    ],
    "outputFormat": "mp4",
    "filters": [
      {"filter": "subtitles=captions.srt:force_style=FontSize=28,PrimaryColour=&H00FFFFFF"}
    ]
  }'
The response gives you a job ID. Poll GET /v1/transcodes/{id} until the status is completed, then grab the output with GET /v1/transcodes/{id}/download.
Simple Text Overlays Without an SRT File
Sometimes you don't need timed captions. You just need a line of text burned into the video, like a watermark, a title card, or a call-to-action. FFmpeg Micro has a virtual option for that.
The @text-overlay option lets you add styled text without writing any FFmpeg filter syntax:
{
  "inputs": [
    {"url": "https://storage.example.com/video.mp4"}
  ],
  "outputFormat": "mp4",
  "options": [
    {
      "option": "@text-overlay",
      "argument": {
        "text": "Subscribe for more tips",
        "style": {
          "position": "bottom-center",
          "fontSize": 48,
          "fontColor": "#FFFFFF",
          "outlineThickness": 2
        }
      }
    }
  ]
}
Behind the scenes, this generates an ASS subtitle file with your text and styling, then applies the subtitles filter. You get clean, anti-aliased text without touching any FFmpeg syntax.
SRT File Format Quick Reference
If you're generating SRT files programmatically (which you probably are if you're reading this), here's everything you need to know about the format.
| Part | What it is | Example |
|---|---|---|
| Line 1 | Sequence number (starts at 1) | 1 |
| Line 2 | Timecode range (start --> end) | 00:00:01,000 --> 00:00:04,000 |
| Line 3+ | Subtitle text (one or two lines) | Welcome to this tutorial. |
| Blank line | Separates each subtitle block | (empty line) |
Here's a complete example:
1
00:00:01,000 --> 00:00:04,000
Welcome to this tutorial.

2
00:00:04,500 --> 00:00:08,000
Today we're covering video captions.

3
00:00:08,500 --> 00:00:12,000
Burned-in subtitles work everywhere.
Five rules that will save you debugging time:
- Use commas for milliseconds, not periods.
00:00:01,000is correct.00:00:01.000will fail silently in some players. - Sequence numbers must be unique and sequential. Gaps or duplicates cause rendering issues.
- Blank lines between blocks are required. Missing them merges subtitle entries together.
- Save as UTF-8. Other encodings cause garbled text, especially with non-Latin characters.
- Line breaks within a subtitle block create multi-line captions. Most players support two lines max.
If you're using a speech-to-text service like Whisper, Deepgram, or AssemblyAI, they can output SRT directly. Pipe that into the FFmpeg Micro API and you've got an automated captioning pipeline.
Automating Captions at Scale
The real value of an API-based approach shows up when you're processing more than a few videos. A typical automation flow:
- Video gets uploaded to your app
- Speech-to-text service generates an SRT file
- Your backend sends both files to FFmpeg Micro's
/v1/transcodesendpoint - Poll for completion or use a webhook
- Download the captioned video and serve it to your users
You can wire this up with n8n, Make.com, or just a simple script. The point is that you're not managing FFmpeg installations, font dependencies, or scaling infrastructure.
FFmpeg Micro has a free tier, so you can test this entire flow without paying anything. Sign up and grab an API key to try it with your own videos.
About Javid Jamae
Founder & CEO at FFmpeg Micro
Javid is a software engineer, author, and entrepreneur with over 25 years of professional software development experience across enterprise, startup, and consulting environments. He founded FFmpeg Micro to make video processing accessible to developers through a simple, automation-first REST API.
You might also like

How to Add Text to Video with FFmpeg (CLI and API)
Learn two ways to add text overlays to video: FFmpeg drawtext filter for CLI and FFmpeg Micro @text-overlay API for automation.

How to Use FFmpeg with n8n for Video Editing Workflows
Step-by-step tutorial for building video editing workflows in n8n using FFmpeg Micro API. Covers transcoding, resizing, watermarks, and batch processing.

How to Transcode Video with an API (Skip the FFmpeg Server Setup)
Learn how to add video transcoding to your app with a simple API instead of managing FFmpeg servers, job queues, and scaling infrastructure.
Skip the command line
The Auto Captions blueprint transcribes your video and burns the captions in. You just review the transcript.
Run it (free)